Naval Structure Toolkit - User Manual
Introduction
TODO
Plugin installation
Overview
The plugin installer can be downloaded at 
A free trial is included, and yearly licenses can be purchased on the aforementioned page.
Naval Structure Toolkit works with Rhino 61) and Rhino72).
Yak
Our plugins are also compatible with Yak, Rhino's new package manager 3), which is basically an application store for Rhino. You just need to call Rhino's command _PackageManager:
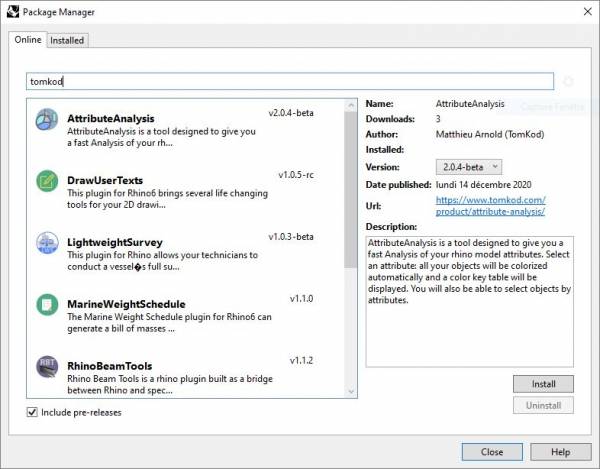
You can also install from the repository with the following command line:
"D:\Program Files\Rhino 6\System\Yak.exe" install 'PluginName'
If you add this in a batch file (*.bat) at windows startup, it is probably the best way to keep all your plugins up-to-date ![]()

License activation
Prerequisites
The free evaluation can be used once per computer, and requires network access to www.license.tomkod.com
The license activation requires network access to www.tomkod.com
Please check your firewall in case of failure.
Activation form
The activation window automatically shows up when the plugin is loading and a valid license or trial is not registered.
If you want to see, change or remove your license while the plugin is already loaded, you can use the Rhino commands PluginName_License.
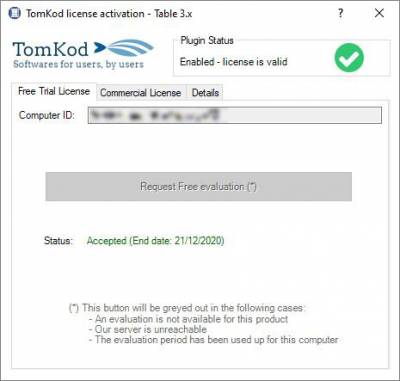
Activation status is always visible on the upper right corner of the form, if the icon is green your plugin will be enabled:

Trial Tab
This first tab is dedicated to the trial requests. Your trial status is displayed, and the button is disabled if a trial is not available for your computer (Your trial has already been activated, or the server is unreachable)
Commercial Tab
This tab's two main buttons let you Check-out (Activate) or Check-in (Desactivate) your license from our license server.
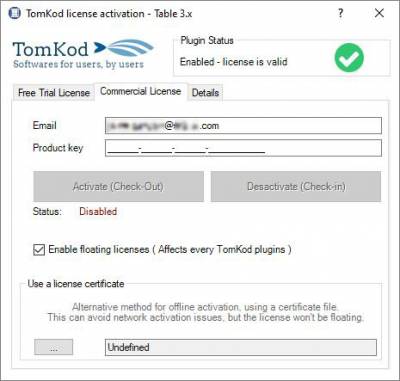 When the checkbox “Enable floating licenses” is checked, every TomKod's plugin will try to deactivate the license automatically when closing (Making it available for another of your computers)
Finally, a license certificate (*.TkLic) can be selected at the bottom of this tab. It allows to activate a license offline, but the license won't be floating anymore. If you need one, contact us at https://www.tomkod.com/contact/
Toolbar
The toolbars for Rhino are always included in your plugins installation directory, or can be downloaded here.
You just have to drag/drop the file “Tomkod.rui” to a rhino window to install them.
Commands
NST_About
This command can be used only from the command line prompt. It displays the plugin's current revision and license status.
add image
NST_License
This command can be used only from the command line prompt. It displays the plugin's activation form.
See license_activation.
CheckPlatCut
TO DO: Add description
Walkthrough
- Launch the command
- First Step

- Second Step

TODO: Add animated gif
Scripted mode
No scripted mode is available for this command.
IDsToUserText
TO DO: Add description
Walkthrough
- Launch the command
- First Step

- Second Step

TODO: Add animated gif
Scripted mode
No scripted mode is available for this command.
SolidMass
TO DO: Add description
Walkthrough
- Launch the command
- Select an extrusion or a closed polysurface
- The object's mass and centroid coordinates will be displayed in command line feedback
TODO: Add animated gif
Options
| Material | Either a material from the editable material list or “Other”, which will ask to manually enter a volumic mass 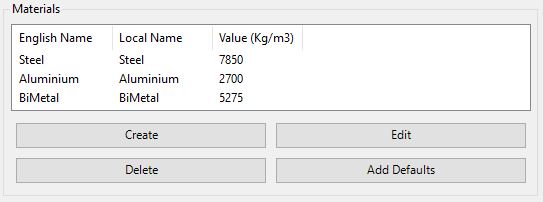 |
| WeldingPercentage | The margin to add to the result to consider welding masses (%) |
| DrawCentroidPoints | If enabled, a point will be added to the model at the centroid's location |
Scripted mode
No scripted mode is available for this command.
IntersectSolids
Check object intersections between two or several closed polysurfaces. The clashes volumes are added to the doc, in a layer named “clashes”
Walkthrough
- Launch the command
- First Step

- Second Step


Scripted mode
No scripted mode is available for this command.
ExportPartsToDxf
Exports selected curves and annotations to a DXF file.
Walkthrough
- Launch the command
- First Step

- The dxf file with the selected items is saved as: %ModelDIrectory%\Platcuts-%DocAttributeForBlockNumber%\%LayernameExtract%\%ObjectReference%.dxf
TODO: Add animated gif
Options
| DocAttributeForBlockNumber | value from a document usertext. The targeted usertext can be changed in the MSW option panel. |
| LayerNameBeginWith | Filter objects by the beginning of their layer name. The targeted user text can be changed in the MSW option panel. |
| ObjectReference | value from an object's usertext. The targeted usertext can be changed in the MSW option panel and is common with several other commands. |
Scripted mode
No scripted mode is available for this command.
Bracket
TO DO: Add description
Walkthrough
- Launch the command
- First Step

- Second Step

TODO: Add animated gif
Scripted mode
No scripted mode is available for this command.
Cuto
TO DO: Add description
Walkthrough
- Launch the command
- First Step

- Second Step

TODO: Add animated gif
Scripted mode
No scripted mode is available for this command.
Rails
TO DO: Add description
Walkthrough
- Launch the command
- First Step

- Second Step

TODO: Add animated gif
Scripted mode
No scripted mode is available for this command.
GeneratePlateMarking
TO DO: Add description
Walkthrough
- Launch the command
- First Step

- Second Step

TODO: Add animated gif
Scripted mode
No scripted mode is available for this command.
DevelopPlanarPlate
TO DO: Add description
Walkthrough
- Launch the command
- First Step

- Second Step

TODO: Add animated gif
Scripted mode
No scripted mode is available for this command.
SelectByBorderDetection
Available only for Rhino7 and later
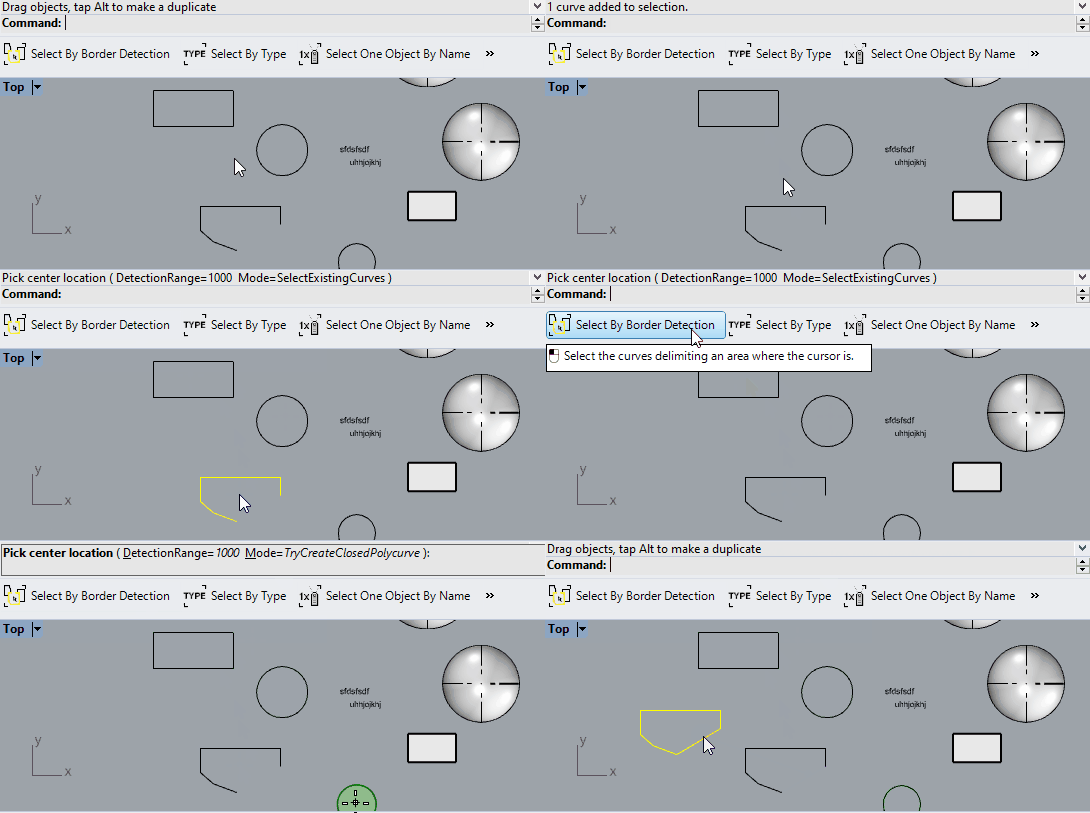
Tries to detect and select a room's walls. Useful for drawings with many short curves delimiting a ship's or building's rooms.
Walkthrough
- Start the command
- Hover the model: the result is previewed in real-time
Options
DetectionRange
Limits the detection range where the command will look for walls. Default value is 10004)
Mode
Two modes are available:
- SelectExistingCurves is just a selection of existing objects
- TryCreateClosedPolycurve will always returns a closed polyline. If needed line segments may be added.
DisplayArea
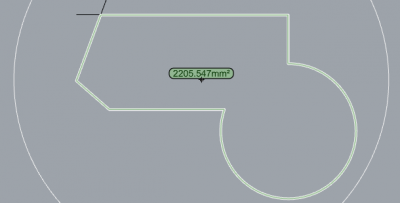
When enabled, the area will be displayed during the preview if the polycurve creation is successful.
