This is an old revision of the document!
Rhino Beam Tools - User Manual
Introduction
Rhino Beam Tools is a plugin for Rhino 3D, designed to draw mechanical Beams and Nodes in context, then export them in a Beam calculation software. Currently, RhinoBeamTools is only compatible with ©Steel1) (Editor: ®Bureau Veritas).
Plugin installation
Overview
The plugin installer can be downloaded at: https://www.tomkod.com/product/rhino-beam-tools/
A free trial is included, and yearly licenses can be purchased on the aforementioned page.
Rhino Beam Tools works for Rhino 5 2), Rhino 6 3), and Rhino74).
Yak
Our plugins are also compatible with Yak, Rhino's new package manager 5), which is basically an application store for Rhino. You just need to call Rhino's command _PackageManager:
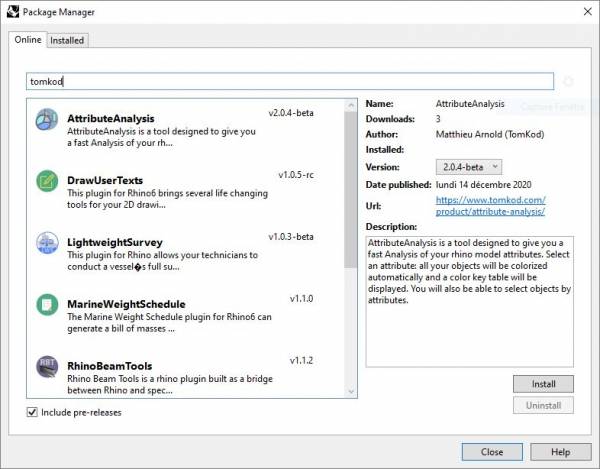
You can also install from the repository with the following command line:
"D:\Program Files\Rhino 6\System\Yak.exe" install 'PluginName'
If you add this in a batch file (*.bat) at windows startup, it is probably the best way to keep all your plugins up-to-date ![]()

License activation
Prerequisites
The free evaluation can be used once per computer, and requires network access to www.license.tomkod.com
The license activation requires network access to www.tomkod.com
Please check your firewall in case of failure.
Activation form
The activation window automatically shows up when the plugin is loading and a valid license or trial is not registered.
If you want to see, change or remove your license while the plugin is already loaded, you can use the Rhino commands PluginName_License.
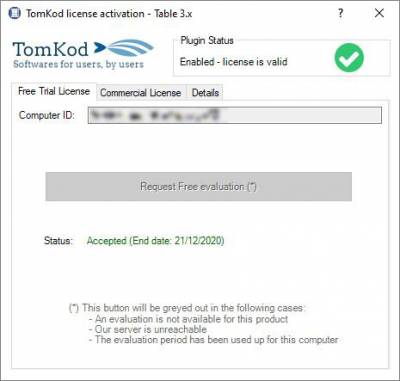
Activation status is always visible on the upper right corner of the form, if the icon is green your plugin will be enabled:

Trial Tab
This first tab is dedicated to the trial requests. Your trial status is displayed, and the button is disabled if a trial is not available for your computer (Your trial has already been activated, or the server is unreachable)
Commercial Tab
This tab's two main buttons let you Check-out (Activate) or Check-in (Desactivate) your license from our license server.
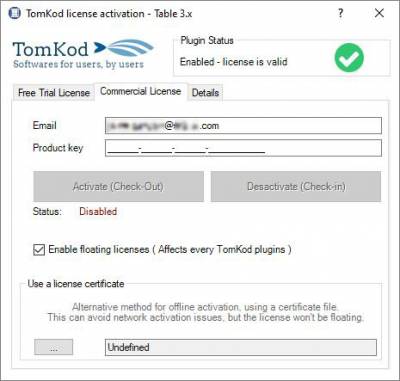 When the checkbox “Enable floating licenses” is checked, every TomKod's plugin will try to deactivate the license automatically when closing (Making it available for another of your computers)
Finally, a license certificate (*.TkLic) can be selected at the bottom of this tab. It allows to activate a license offline, but the license won't be floating anymore. If you need one, contact us at https://www.tomkod.com/contact/
Toolbar
The toolbars for Rhino are always included in your plugins installation directory, or can be downloaded here.
You just have to drag/drop the file “Tomkod.rui” to a rhino window to install them.
Generalities
Definitions
Nodes
Nodes are custom points with translations and rotation constraints defined on the x, y & z axis. Every node in the model is identified by a unique number.
Beams
Beams are oriented lines located between two nodes 6). They are represented as an arrow and have an optional angle option. Every beam in the model is identified by a unique number.
Sets
A set is a group of beams. It is mainly used to easily select beams together.
Interface
Panel
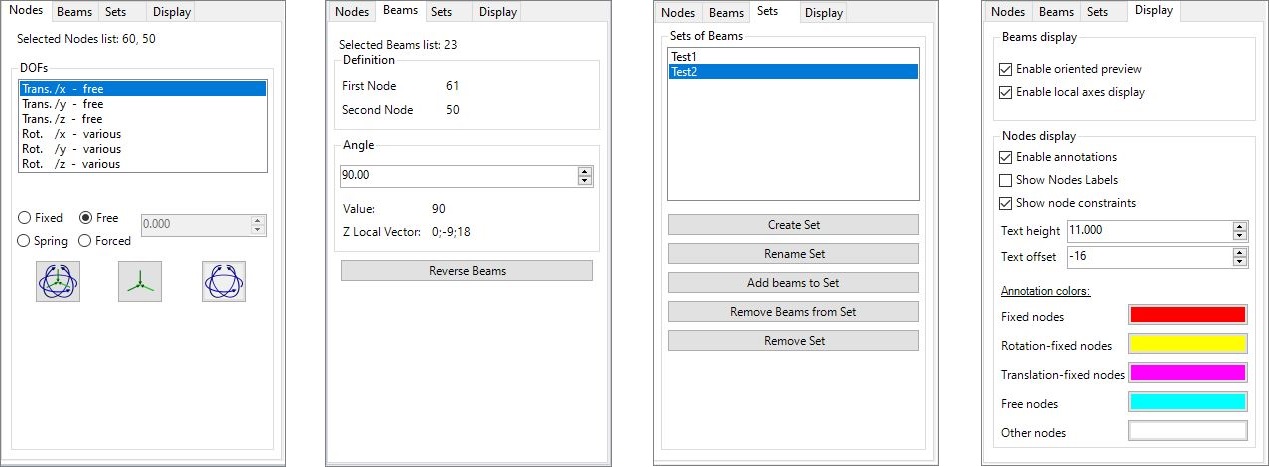
Rhino Beam Tools comes with a user panel to interact with your Beams, Nodes, and Sets.
The panel display is refreshed in real-time. If you select a beam or a node in the model, the panel is automatically enabled and the appropriate tab is opened.
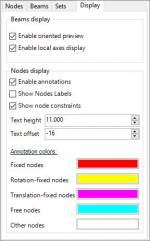
The Display tab offers quick access to display settings.
Annotations
Rhino Beam Tools offer the possibility to display annotations in the model with every node's settings:
 The content, size, offset and color of these annotations can be edited in the RhinoBeamTools' panel's Display tab.
Constraints can be “Fixed”, “Free”, “TranslationFixed”, “RotationFixed”, or Custom.
Custom constraints are displayed like this: x , y & z values for translation (t), then x , y & z values for rotation (r).
The values can be 0=fixed , 1=free, 2=spring, 3=forced.
In the example above, the node #87 is rotation-Free, with translation-fixed on x, translation-spring on y, and translation-free on z
Display settings
The display settings can be edited from RhinoBeamTools' panel's Display tab. These settings are immediately applied when their values are changed and are saved in the plugin.
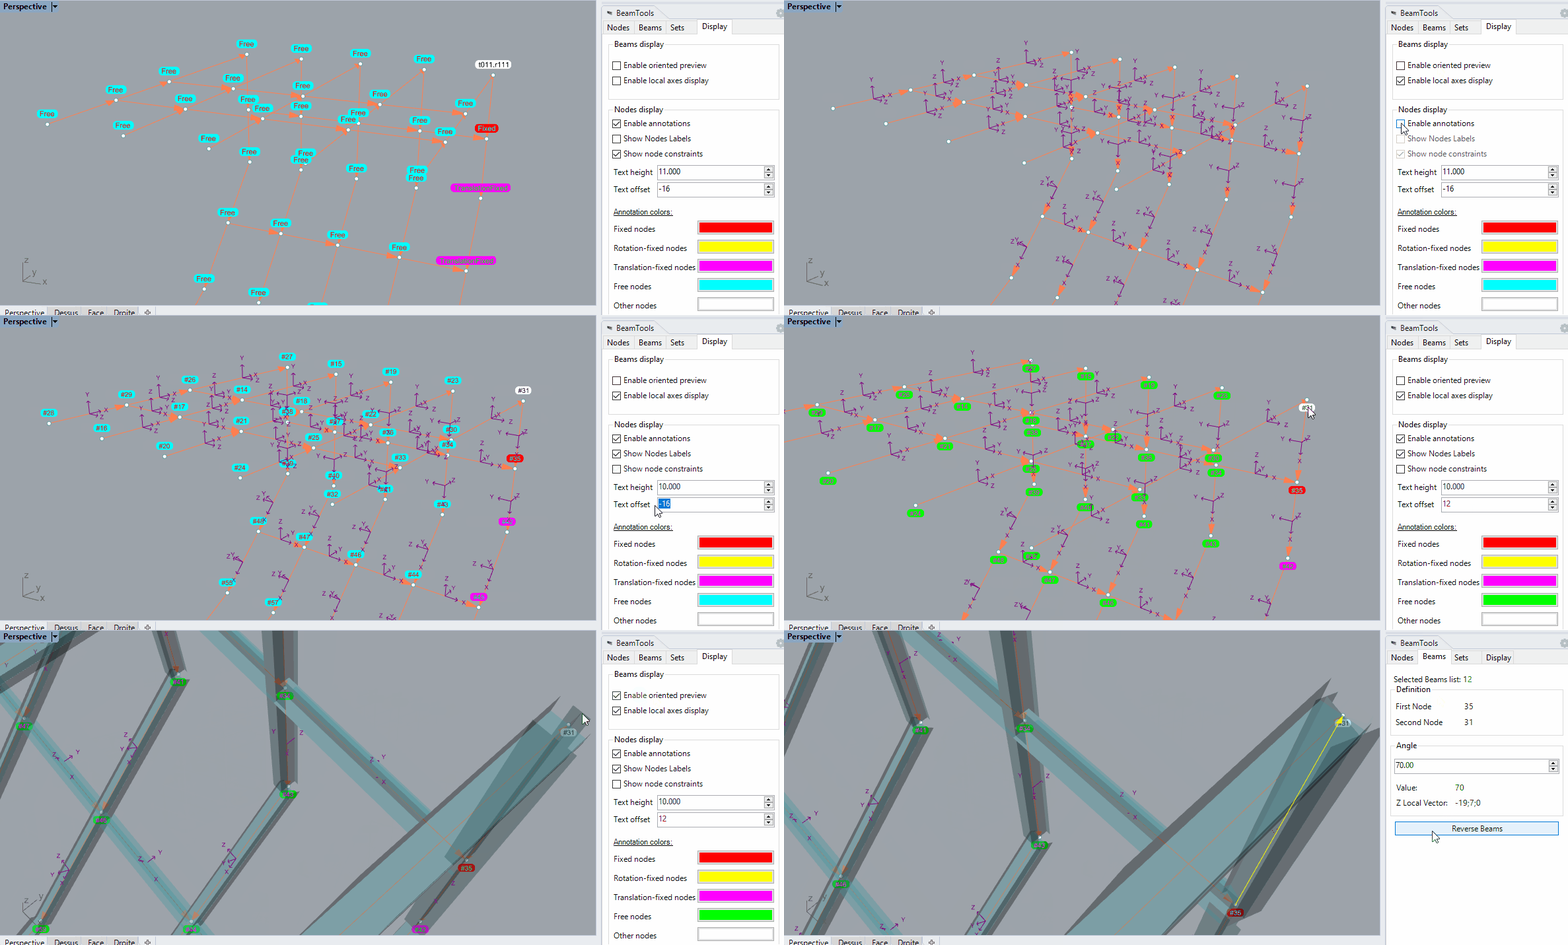
| Name | Description | ||
|---|---|---|---|
| Beams display settings | Enable oriented preview | Shows or hides 3D H - shaped beams to make it easier to understand the beams' orientation. |  |
| Enable local axis | Shows or hides the beams' local x, y & z axis, taking into account the beams' angle values. | ||
| Nodes display settings | Enable annotations | Shows or hides the nodes annotations. | |
| Show nodes labels | If enabled, the nodes annotations content will include the nodes' labels. (IDs) | ||
| Show nodes constraints | If enabled, the nodes annotations content will include the nodes' constraints. | ||
| Text height | Sets the nodes annotations' display height. If too small this option might be ignored. | ||
| Text offset | Sets the nodes annotations' display offset. The offset is oriented in the screen vertical direction. | ||
| Annotation colors | Clicking on these buttons opens a dialog form to set custom display colors for particular node constraints. |
Toolbar
A toolbar is included in Tomkod's toolbar group, with buttons available for most commands:

todo: Update capture with updated ToolBar
Commands
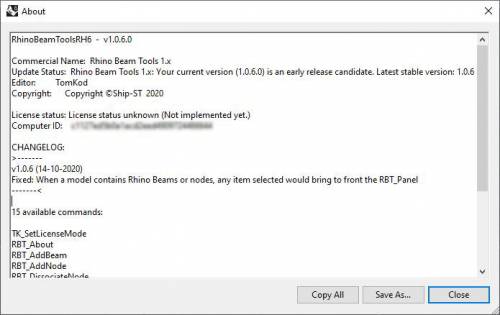
RBT_About
This command can be used only from the command line prompt. It displays the plugin's current revision and license status.
RBT_License
This command can be used only from the command line prompt. It displays the plugin's activation form.
See license_activation.
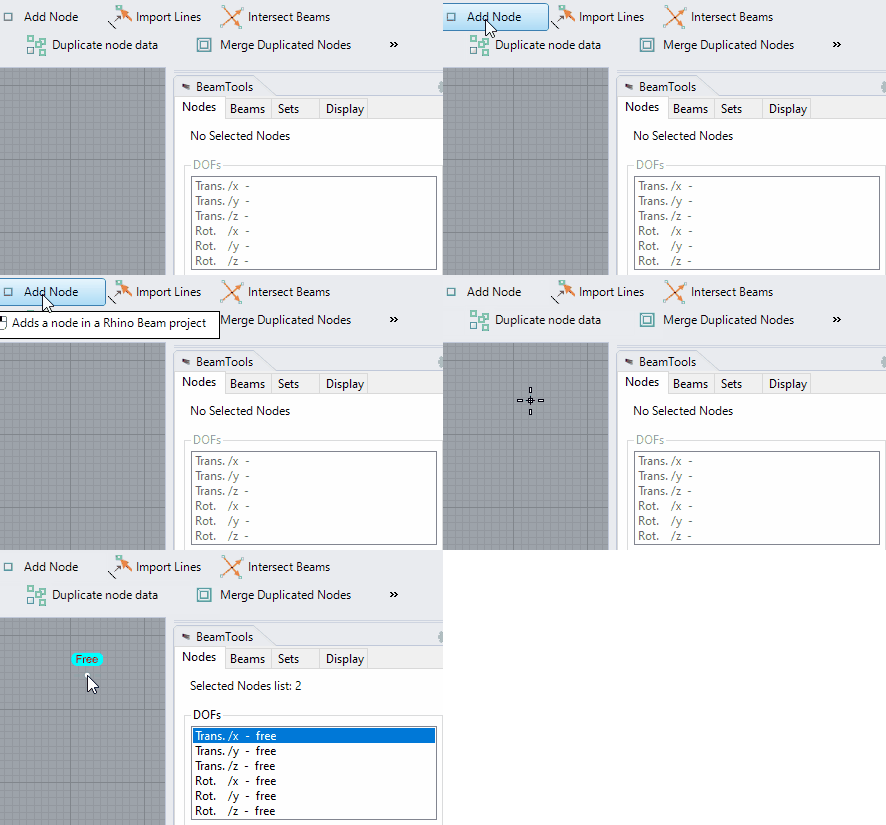
RBT_AddNode
![]() This command adds a node to the model.
This command adds a node to the model.
Walkthrough
- Pick a location
- The node is created without constraints (Free)
Options
No option available.
RBT_AddBeam
![]() This command adds a beam to the model.
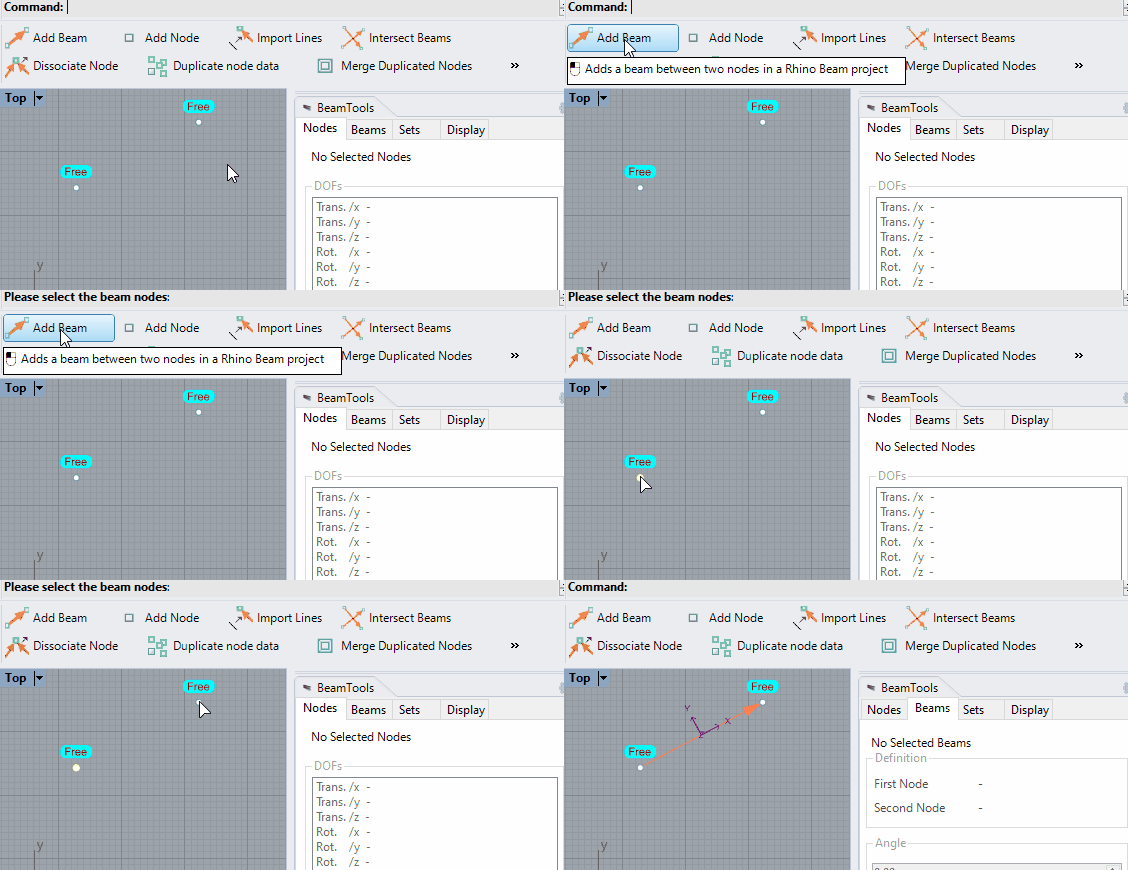
This command adds a beam to the model.
Walkthrough
- Pick two nodes
- The beam is created from the first node to the second node.
Preselection
Preselection is allowed, but the nodes' order will be random. If more than two nodes were preselected, the beam will randomly be created between two nodes.
Options
No option available.
RBT_DissociateNode
![]() This command allows to separate two beams with a common node by duplicating the node.
This command allows to separate two beams with a common node by duplicating the node.
Walkthrough
- Select the beam that should be dissociated (The one that will be linked to a new node)
- Select which node should be dissociated: StartNode or EndNode
- Choose if the node constraints should be duplicated 7). If No is selected, the new node will be unconstrained (Free).
- Pick the new node location
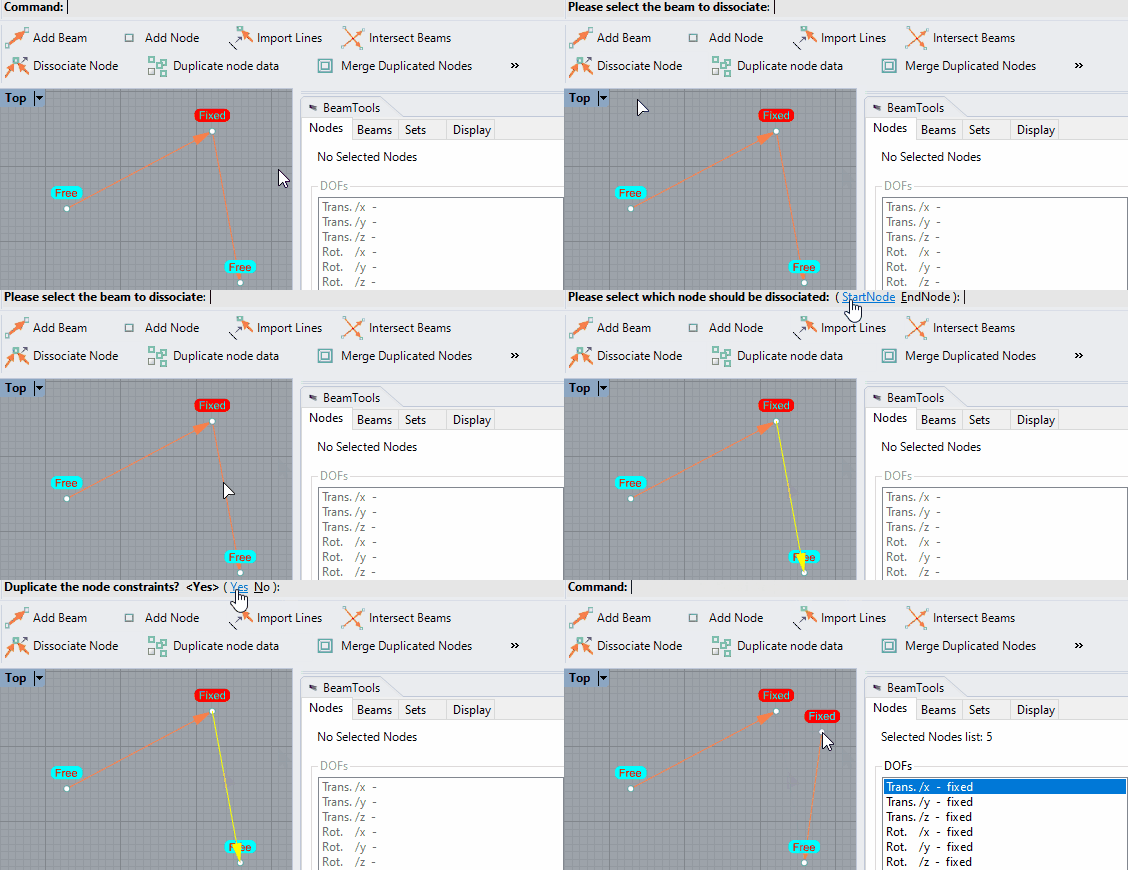
Preselection
Preselection is allowed if only one beam is preselected
Options
- StartNode or EndNode
- Duplicate the node constraints
RBT_ImportLines
![]() This command can convert lines and curves into beams and nodes.
This command can convert lines and curves into beams and nodes.
Walkthrough
- Select the line and curves that should be imported
- Choose if the original lines should be removed
- For each non-linear curve, a segment count option is shown to split the curve into several lines. The current view is zoomed in and the current curve is highlighted.
- Every beam and node is created, duplicated nodes are removed and intersecting beams are split.
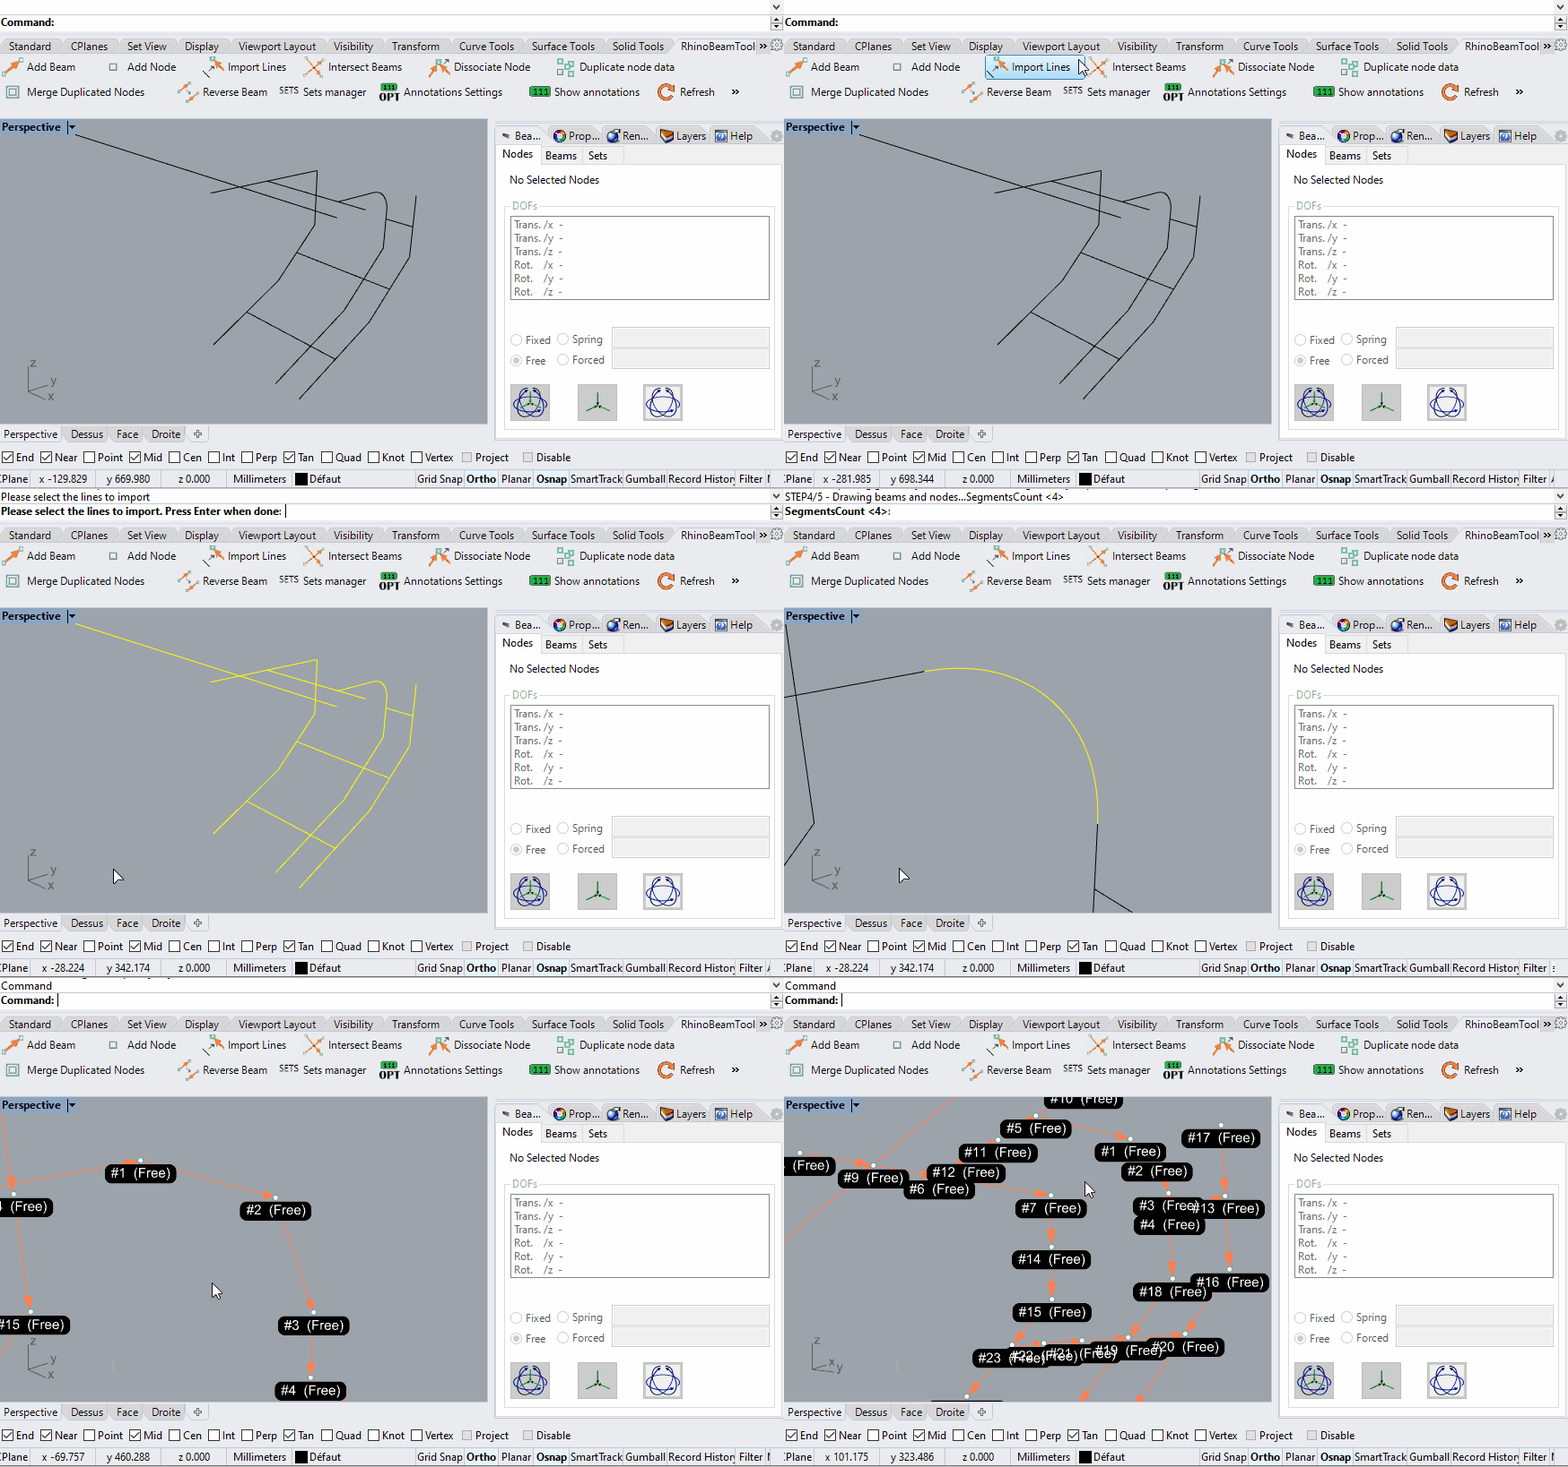
Preselection
Preselection is allowed.
Options
- Delete original lines: Select whether or not the original curves should be removed from the model upon completion.
RBT_IntersectBeams
![]() This commands check the whole model and adds node at beams intersections.
This commands check the whole model and adds node at beams intersections.
Walkthrough
Launch the command and that's it!
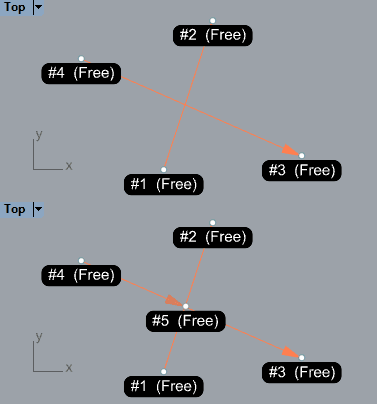
Options
No option available.
RBT_MergeDuplicateNodes
![]() This command merge node with the same location.
This command merge node with the same location.
Walkthrough
- Set the tolerance (Default 0.001)
- Every duplicated nodes are merged in the model
Options
- Tolerance : in model unit, maximum distance to consider two nodes duplicated.
RBT_Export
Todo: Add the new icon
Exports your beams, nodes, and sets to ©Steel8) or RDM7.
Walkthrough
- Launch the command
- Select a file path and extension to export the model to ©Steel3 (*.stw*), ©Steel4 (*.steel*), or RDM6-7 (*.por*)
- The file is created, then RBT attempts to open it with Windows' default program for this extension.
Scripted mode
No Scripted Mode
Options
No option available.
RBT_SetManager
This command9) is a direct link to the Rhino Beam Tools panel's Sets tab
Walkthrough
- Launch the command
- RhinoBeamTools' panel10) will be opened, with the Sets tab selected.
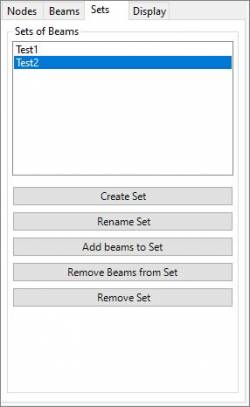
Options
No option available.
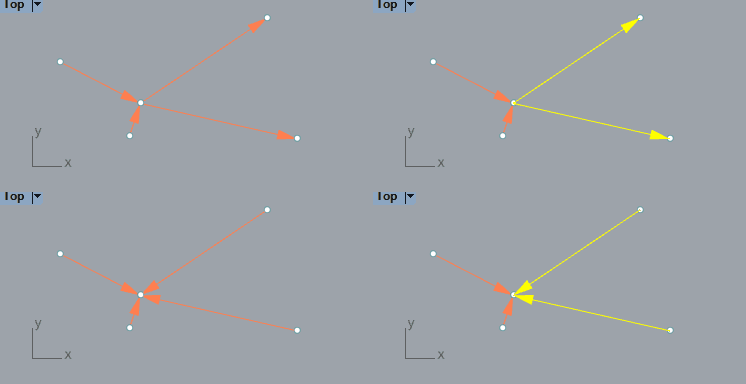
RBT_ReverseBeam
![]() This command reverses the beam's first and second node.
This command reverses the beam's first and second node.
Walkthrough
- Select the beams
- The beams nodes are swapped. The arrows' orientations are refreshed as well as the nodes' info.
Preselection
Preselection is allowed, every selected beam will be reversed.
Options
No option available.
Alternative
A “Reverse beam” button is available on the panel's Beams tab. It does the same thing but does not allow to reverse several beams at the same time.
RBT_DuplicateNodeData
![]() This command copies a node's constraints to another.
This command copies a node's constraints to another.
Walkthrough
- Pick the original node to duplicate its constraints
- Pick one or several nodes that need to be changed
- The selected nodes are updated with the original node's constraints

Preselection
Preselection is enabled if one and only one node is preselected.
Options
No option available.
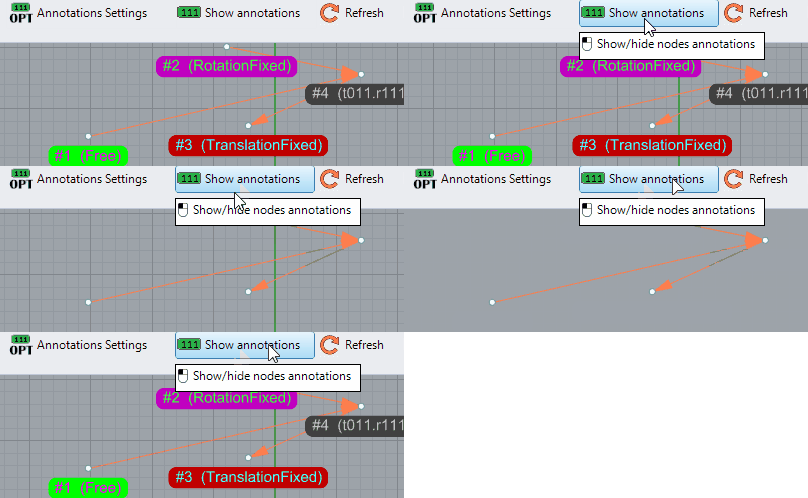
RBT_ShowAnnotations
![]()
Walkthrough
- Launch the command.
- If annotations were visible, they are hidden, if they were hidden they will be shown
Options
No option available.
RBT_DisplaySettings
Todo: Add the new icon
This command11) is a direct link to the panel's Display tab
Walkthrough
- Launch the command
- RhinoBeamTools' panel will be opened, with the Display tab selected. See interface for more details.
RBT_ImportSteel4File
This command is a beta prototype. It might have unwanted behaviors and we will decline any responsibility if it causes damages to your model. TomKod may or may not publish a proper version at a later date.
Attempts to import a Steel (*.steel) project beams' and nodes' in your Rhino models.
Walkthrough
- Launch the command
- Select the file to import
- Nodes are imported with their contraints
- Beams are imported
RBT_Refresh
![]() This command forces a display update:
This command forces a display update:
- Overlapped nodes are merged
- Beam errors are detected
- Beam positions are fixed
- Rhino views are redrawn
Normally you don't need to use this command.
Options
No option available.